Thursday, October 22, 2015

Mushrooms


I've been an occasional forager for mushrooms for over 20 years......I'm cautious after working for a few months in the San Francisco Poison Center in November, when new immigrants would occasionally ingest seemingly familiar mushrooms with deadly consequences or we'd field a call about a child who'd eaten a mushroom off the front lawn.

My first solo foray was in Pt. Reyes State Park and I picked and filled a big hat with mushrooms I picked off the damp forest floor.  I'm a good observer and I sort of figured out what were probably edible boletes, probably russole, and probably amanitas.....I wasn't intending to eat any based on my untutored hunches but they were confirmed at the parks entrance when a couple with a basket Full of Porcini and chanterelles stopped me to tell me that the amanita I'd picked was indeed poisonous.

Since then, I've been to mushroom fairs, guided forays, hung out with mushroom experts and read lots of books. I'm not an expert, but there are a few that I can reliably identify, a few more that are hard to get wrong and a bunch more that I find now and then that I'm "pretty sure" are this or that but won't eat them until I can find an expert to confirm what I think.

While in Santa Fe, I'd regularly find Porcini and chanterelles and shaggy manes, here in Italy we find on our property lots of common field mushrooms (agaricus) sp., chanterelles, puffballs, lactarius, once a truffle, and I'm still hoping to find a morel.
We have poisonous mushrooms too. Amanita's fruit regularly, I think they're Grisette's (so probably edible) but I won't eat any of the Amanita's and I check EVERY mushroom to make sure there's no volvulus (the sac at the base that means it's a potentially deadly amanita).


This is a big mushroom.


 This year I was surprised to find a large fruiting of a very large agaricus. Driving in I saw what looked like a dozen white plastic plates in a distant field and told my son, we have to go check those out....they're probably Horse mushrooms!    I did check them out. We picked some and I ran them through the algorithm in the David Aurora's wonderful book,  Mushrooms Demystified that is useful for identifying mushrooms.
Large white agaricus, non-staining, tan to pink to brown gills, no phenolic smell.....that sure sounds like Agaricus Arvensis (the horse mushroom--a good edible). But nearby I found another very similar grouping, and these did stain yellow (a bit) and did have a funny smell......that would mean Agaricus Xanthoderma (not edible/poisonous). Neither had the almond smell that was supposed to mean the edible type. Spore print-chocolate brown (like all the agaricus)...so I cooked a tiny portion of one and didn't have to even taste it as once cooked an odd, medicinal, odor came out of them that convinced me that they were probably not something to eat without a better confirmation than, "probably".
This clump had some yellow staining at the base and a funny smell. ? Agaricus Xanthoderma?

Agaricus? xanthoderma or arvensis?


Slippery Jacks and Field mushrooms (agaricus campestris) and chanterelles under both.

Fortunately, it's been wet and there was a whole field of mushrooms I knew we could eat.  I picked some slippery jacks (Suillus Granulatum) and Field mushrooms (agaricus campestris) and Chanterelles and we cleaned those and cooked them with garlic, olive oil,  and a little soy sauce.
Chanterelles from the front lawn!


Saturday, October 17, 2015

Baren Tests


I spent a few hours yesterday testing my home-made barens and comparing them to the professional-grade Murasaki (strong) and the ball-bearing barens that I already own.


These tests were performed on damp, double-weight, coated bond paper for inkjet papers.
It's what I use for demos and proofing as it is easy to register and prints well when damp.
Then the heavier barens were also tested on Magnani Incisioni, a 190g/m2 etching paper that I use for some of my smaller moku hanga works and that prints well when a good baren is used with lots of pressure.
Not surprisingly, the best impressions, cleanly and efficiently printed with little effort were with my $150 Murasaki Baren.  More suprising, instead, was learning that my twisted-cord Barens all worked reasonably well. They needed more work and rubbing and left a lighter impression but improved greatly by printing twice.
My Thumbtack baren was too strong for this small piece of wood, printing over the grain and causing the paper to slip. With extra care to keep the paper from moving, it also gave a decent impression.
My Ball-Bearing baren was surprisingly weak on thick paper.

My twisted-cord barens all performed surprisingly well for a cheap baren made from humble materials and designed to be suitable for beginning users.
They needed more concerted pressure to get an impression, but with TWO passes, yielded very satisfactory results. This impression is from my nylon twisted-cord baren, printed Twice.
Baren #4, printed twice.
 And here is one printed with a twisted hemp cord coil: one impression on damp bond paper.
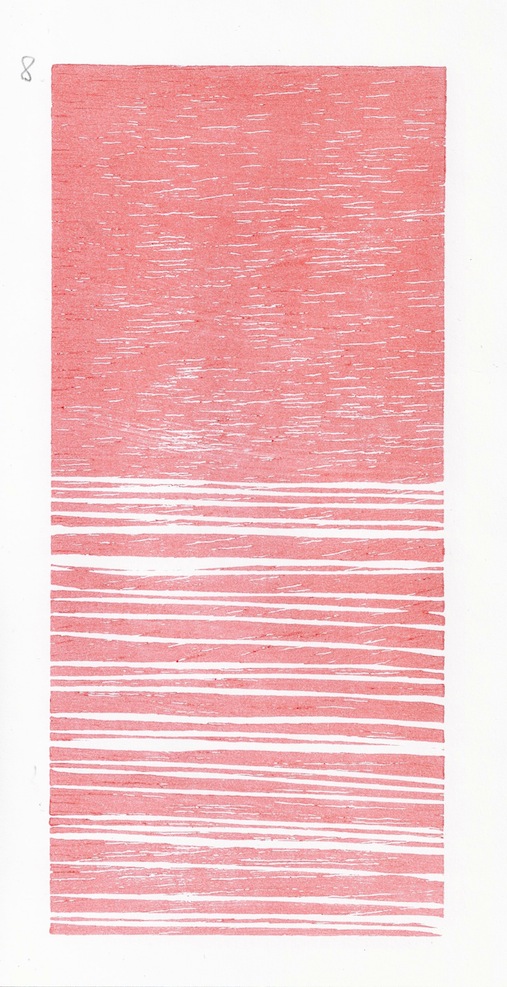
Baren # 8 Hemp cord and vinivil
While my thumbtack baren was harder to use. I had paper slippage (three times) with the dampened bond paper which wasn't a problem with any other baren. With incomplete rubbing I got Baren-suji, the marks left by the baren path.
But with care to make sure the paper didn't move, the impression was good, but heavy. The wood grain was partially lost, and there is some color that squished out here and there from the heavier pressure.
Thumbtack Baren, Rives etching paper.

Thumbtack Baren/Bond paper

Thumbtack baren, suji and slippage.


The Murasaki Baren printed cleanly on both the etching and bond papers.
Surprisingly,  My expensive ball-bearing baren was the weakest:
Ball-Bearing baren


This was not a blinded test. I knew which baren I was using and varied the pressure and effort of rubbing to match the baren.  My goal was to find out if I could get a decent impression from each baren not how they would all print with the same effort.
I'd like to go back and retest the ball-bearing and thumb tack barens to see how they perform on normal and medium-weight washi and with  bigger passages of printed color.
Another fun test would be to print a small batch of prints, using different barens for each copy but on the same paper.  This would allow me to see the tonal variations of the various barens in multiblock prints. 
I'd also like to print a big section of color using them to see how the tack baren performs when really worked hard. 


Thursday, October 15, 2015

Etaga-ME!


"I look a little like this"
My etagami penpal, Yasuko Izumiya, will be coming to Florence for the 17th LAILAC Japanese Festival next month and although we have been exchanging these sumi ink and watercolor drawings for over two years, we've never met in person. The Japanese Etagami Society has many members and last year's group and the publicity they received in their monthly journal (with photos of the fair, the etagami tables, the paintings they did of Florence) has stirred up much interest and I'm told that this year there is a waiting list of those who wanted to come......Most are in their 70's and 80's, so it's quite a stretch to imagine flying from Japan to Italy, touring the country a bit, spending two full days at the Fair, hosting the Etagami tables and helping young and old alike learn how to make etagami, jet-lag and all.

I will be demonstrating moku hanga prints again this year and I've also volunteered to help out with the etagami section if there's need.
I'm thrilled I get to meet my Etagami-pal after sharing  drawings of flowers, bugs and everyday objects with her for almost 2 years.

As we've never met, and there will be a big crowd, I'm sending her these cards to help her pick me out from the others.


Friday, October 9, 2015

Baren Play--home-made barens revisited. Italianism schedule?

In preparation for tomorrow's ITALIANISM art fair and creative conference in Rome, I've been busy making barens. While technically, I think I'll be demonstrating moku hanga printing and carving....it's a group of artists and designers, and in my experience, the baren is what really makes people curious.


I make these twisted-cord barens for my moku hanga workshops--they work better than the plastic ones--but I'm still looking for how to improve them.  Since I'm working more often with Western papers (as it's still hard and expensive to get Japanese washi way out here in Florence), I continue to look for ways to strengthen the barens to allow them to work well on thicker papers.

 
I made a thumb tack baren (after seeing examples on the web) which has steel 9mm tacks. They're quite hard, but far apart so I'm curious to see how it prints. It should be a hard baren, suitable for color passages on thick paper.

Tomorrow I'm demonstrating moku hanga.
It's a long day 10am through probably 8-10pm (when the music starts).

So here's the tentative schedule I'm planning on following.
10am-noon:  Organize my table and work on a small carving for later printing (baren tests).
12:00-4:30pm--I'm printing copies of my Boteh print from white paper to as far as I get.
4:30-5:30  alternative barens: How to make a home-made twisted cord baren.
5:30-6:30  printing tests with a Murasaki/Twisted Cord/Thumbtack and Ball-bearing baren.
7:00 until I'm too tired: More Boteh Braid printing.

I'll be answering questions, and discussing some of the prints I'll have on display for who stops to look or ask.
It should be fun!

Tuesday, September 29, 2015

Italianism: October 10th Rome, Italy: Moku hanga demo


I'm thrilled and  quite excited to have been invited to participate in Italianism http://www.italianism.it/en/  a one-day conference, investigation and display of the current state of the arts in Italy and abroad (by Italians). Set in the larger, month-long, OUTDOOR festival and housed in the mammoth ex-weapons factory and military base in the Flaminio neighborhood of Rome.  I'll be there as one of the participating artists demonstrating Japanese woodblock printing.

Italianism is the project of Renato Fontana and produced by Nu company and Outdoor Festival; There are more than 100 artists participating. There will be Illustrators, Designers, Musicians, Web Designers, Tattoo and Graffiti artists and the general focus is on modern and cutting-edge art and design and the emerging synergy and cross-pollination happening by artists working across media and geographic boundaries.  Housed in a large industrial complex that was once a military barracks and weapons factory the space is enormous with areas dedicated for the music and video stages and the large installation works that fill the many big rooms of the now abandoned factory. There is a section showing the works of 50 contemporary Italian illustrators and a photographic exhibit. 

Connecting two of the large hangars is a long, covered corridor housing the section the organizer has titled: ANALOG 2.0.  20 modern artists who have decided to work in fields that hark from another age and work in decidedly hands-on,  labor-intensive crafts. There is a pinhole and colloid photographer, a silkscreen artist, bookbinders and hand typesetters of artist books, tattoo artists, a  felt illustrator,  a cut-paper artist, a few independent small book publishers, and one, not-so-young, not-so Italian, moku hanga. Japanese woodblock printer (me).


I'll have a table set up with my work, both sample blocks and prints.   I will demonstrate the traditional technique of moku hanga printing, using dry pigment, rice paste and printing with a baren.  I plan on printing most of the day with frequent breaks to discuss the differences between Japanese and traditional western printing techniques and with a session in the afternoon on how how to make a simple but effective, home made baren and to man a printing station for those who'd like to try printing with a baren.
I'll also have some framed and unframed works on display (and on sale) but this will mostly be a chance for me to meet 100 amazing Italian artists and illustrators and to make myself known in this community.  Tickets are 20 Euro and allow entrance to the entire event including Outdoor Festival.
From 10 am to 4AM. See program at the above link.

I should have a more definite program for the day posted here in the next few days.
I hope to see lots of curious and friendly faces in Rome, October 10th at Italianism.

Wednesday, September 16, 2015

Show and Tell: 10 Years of Woodblock prints--Caffe` Petrarca Exhibit and Demo.

I'm exhibiting a good selection of my moku hanga wood block prints for the next three weeks in Florence.

The local bar and caffe`,  Caffe` Petrarca has two large rooms and hosts regular exhibits by local artists.  There is a brisk morning crowd. (Coffee and Pastries) and a very busy lunch crowd...it's popular with the businessmen and women from the local banks and offices as well as students from the Art School across the street.

Visitors are welcome.
Caffe` Petrarca is closed Saturdays, but open other days from 6am-8pm.


I opted in the end to hang prints by theme and subject rather than chronologically. The nudes and figures are in the far end, the botanical prints at the entrance and I put all the bugs, reptiles and odd creatures in a mosaic on the longest wall......and here and there are the prints that defied categorization.....hardware? (Toggle Bolt and Spring), Road signs and movement (Zig Zag and Right of Way) and poor little Scooter Kiss.....which is untranslatable without a fair amount of explanation:
"It's sort of like a Bacio Perugina, only without the hazelnut, and made with inferior chocolate, but it has a similar foil wrapper and the little paper poem or phrase.  They're very popular and often found in offices and school candy jars all over the US. The scooter? Well, no there is no real reason it's riding a scooter other than silly foolishness....." 
Try saying all that in a foreign language.......
Try explaining this to an Italian...

Saturday, September 5, 2015

Home-made Honing Disc. Getting tools sharp enough for moku hanga.


I don't know if the WorkSharp (TM), an American-made, motorized, disc sharpener for woodblock tools comes in a 220V version, but I was worried that the size and bulk made buying and bringing one to Italy in a suitcase impractical (especially since I was already 20kg overweight with blocks and paper).

But since TWO of our neighbors design shoes and handbags (another odd perk of living in Italy), we get the occasional leather remnant and I have a few pieces lying around. AND one of the cardboard pastry discs I use for my barens was way too big to use for a baren. AND I have 8 sets of Powergrip tools that I need to sharpen after my last moku hanga class for a workshop I'm giving this weekend.
So the odd juxtaposition of need, on-hand supplies, a model to use as a starting point, and the imminent need for 8 sets of sharpened tools got me motivated to try something I'd been thinking about.

 I took the cardboard disc and drilled a 8mm hole dead-center.
Then I glued the thin leather to one side with PVA glue (thinned a bit with water). To the other side I glued a 1500 grit wet sandpaper and pressed them both beneath some books overnight to dry.

Today, I loaded the leather side with honing compound (from McClains) and then threaded a long, 8mm bolt through the hole with washers on either side, and nuts to hold the disc tightly when it spins. I placed it into a handheld portable drill that I clamped to my table and by sitting just right (with safety glasses), I could hold the drill power switch with one hand to control the speed while looking  down the edge of the spinning honing disc and carefully place my U-gouges against it at just the right angle, turning them as I did so to finely hone the outside edge of the tool. By looking down the edge of the spinning disc I can hone on the top side with the leather wheel or hold the tool on the underside to lightly grind with the 1500 grit. I used a tightly rolled up piece of 1000grit sandpaper to remove any burr from the inside of the curve and looked at it with a 10X loop. Nice and polished. It took the hairs off the back of my arm with just a light touch. 
And just to be sure, the leftover piece of Okoume plywood that was tearing with the same tool yesterday, now cut cleanly and smoothly with no shredding.
We're in business.
Next, I tried the 1500 grit side of the disc on the Hangi Toh, I have to be careful not to get the tool hot or I'll lose the temper of the steel so I never held it for more than a few seconds at a time on the wheel and even the 1500grit takes metal off faster than I'd like so I do have to be careful.  But I put a new bevel on the Toh in less than a minute (on/off, on/off) and then buffed it on the leather side.

I made another disc (this time with a pressed-wood disc that came pre-drilled with a 8mm hole) it was for a decoupage clock face (3 Euro at the craft shop) and I glued a 600 grit and 1000 grit wet/dry sandpaper sheet to either side.
These will be used only for changing bevels and really dull tools.
The drill is held in a vice so I can power it with one hand while I can gaze down the spinning wheel and hold the tool against it. There is leather and honing compound on the top, a 1500 grit paper on the bottom half.


The stiffer disc was definitely an improvement though as there is no wobble so it's easier to keep the bevels even and true.  (And I think I'll try to convert my leather one to the stiffer disc as it's a little easier to control). But first:
Tomorrow I'm going to hone the 8 sets of Powergrip tools for my class.
While I do this regularly by hand (using waters stones of 1000/6000 grit) on my good knives but with this many tools, I think the honing disc will get them all sharp enough for the students in about a 1/2 hour.
More importantly, they'll be sharp enough that they'll carve the plywoods easily, and that will make the work easier for beginners.