Showing posts with label braid. Show all posts

Wednesday, August 5, 2015

Boteh

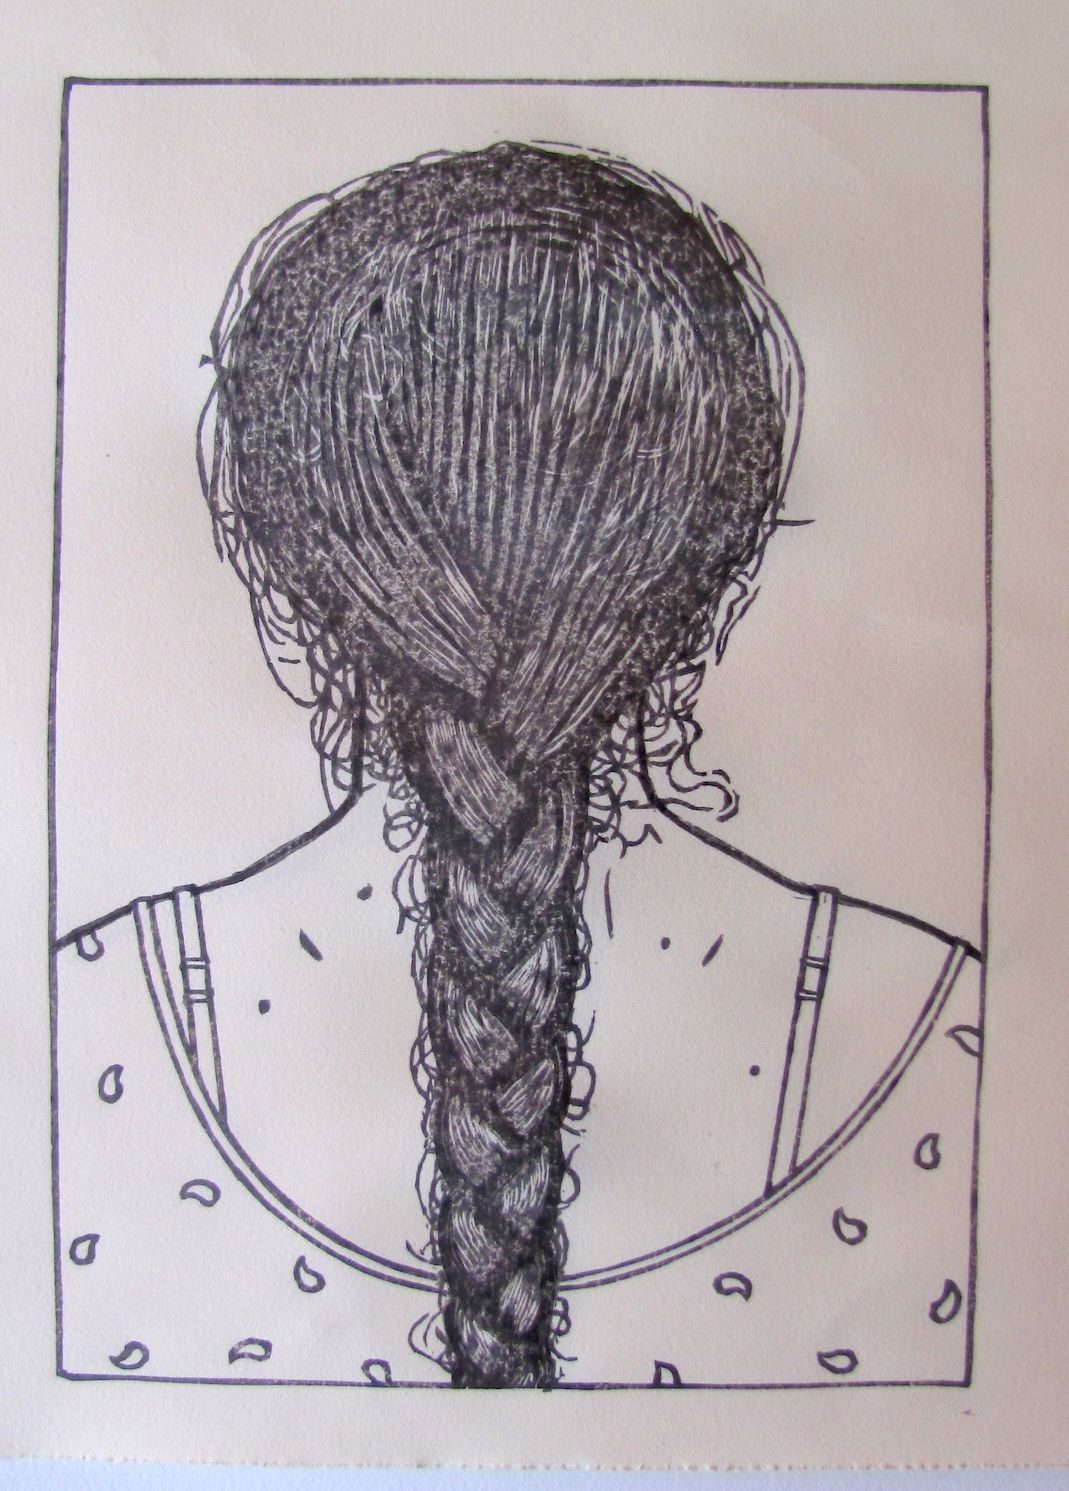
"Boteh" (paisley) 8.25 x 11. 7"

This is the version of my pleated hair/braid print that I completed for the 2015 Awagami International Mini Print Exhibit.  It's pretty close to what I had in mind when I started which is unusual for me and I also finished it with a few days to spare.
I'm working on a variant now, as I also committed to a printmaking exchange and I'll be using this print for that too.
But the colors are different and I'm almost done with those as they need to get out the door by the weekend.


The title is "boteh" which is the leaf or fig-shaped motif seen on the fabric of the dress.  While traditionally the boteh is felt to represent a leaf, it also has been described as a fig or wing or cypress tree.
I wanted to suggest a different origin for this ancient Persian motif and the braided hair of a young woman was created to suggest that idea. The shape of the head and braid mimics the pattern repeating on the blouse and again the shape made by the sleeve slipping off the shoulder to reveal another boteh-like shape. I'm not sure the carpet or textile historians will concur but I think the boteh looks a lot more like a woman's braided hair than a cypress tree or Griffin's wing.


This was printed from 10 of the 11 blocks I carved and there are about 15 impressions in each print.
One cherry block and 9 shina plywood and one birch ply.


Saturday, July 25, 2015

More Hair

The proof of the keyblock reveals that it prints oddly. The cherry is resisting a bit the ink and printed lightly it prints weakly despite the density of the Sumi I'm using. If I print firmly (really hard) I get an almost lithographic-like effect from the wood. The problem is the wavy hair is on the same block as my keyblock and they really should have been on separate blocks as the key block wants lighter pressure for the finer lines that might be damaged by the amount of pressure I'm using to print the hair.  I can sort of cheat using a weak baren to print the block and then go back with a stronger baren to print just the central part where the head and braid are.
It's hard to believe this is woodblock.


The new problem is that it looks great--it's a great tangled mess of hair--very like my wife's actual hair--but the braid definition is now hard to read as there is too much of the same black value where there should be more range.  I thought about it for a while and finally cut another block...the back of the cherry plywood that I got from McClains has a birch plywood veneer to the back side and while it was much harder to carve than the Shina it was more than adequate for the simple block I needed to cut (although there were some knots and voids under the veneer...
So printing this new block in a value darker than the braid yields something closer to my original drawing.


I also cut from a separate Shina block a plate with a simple solid braid/head shape by cutting out just the shape of the braid and head as a solid form.
This will serve to give the head and hair their base color--like a griseille painting the value will come from the black and white keyblock while the color will come from a brown glaze.


Now I just have to decide if I like this better than the way it was without it.
The tangled mass of hair is energetic and plays well against the flat colors of the torso and background....but I still have plans for those.


Here they are with color added:
To the left (orange blouse) is just the keyblock with the added brown base block.
Below (yellow blouse), is the same but with the addition of the braid outline block added last.


Saturday, July 18, 2015

Braiding wood, paper and hair.

Early Proof state--the image is about 7.5 x 10".

I'm working to try to get a new print done for this year's AIMPE Awagami's International Mini Print Competition 2015 for works on Japanese washi (paper) and the deadline is nearing (July 30th).  I also committed to the Baren forum's quarterly print exchange and that too is due July 30th. The paper sizes are different,  with the former a standard A4 (8.25 x 11.5") while the latter is a bigger 10 x 15"....but after playing with half a dozen designs I settled on one I've been working on off and on for a few years that I knew would work well with both formats.

It's based on a drawing I did a few year's ago when my wife still had waist length hair that she would wear in a tangled braid.  I did an etching similar to this also a few years back but was never happy with that.

The basic concept is simple and fairly formal...a woman's head and back with the picture plane divided by the dark braid....but the variations are endless....and I've doodled simple, idealized, literal, and exaggerated backs and braids in many of the sketchbooks I've filled.
In this case these sketches were drawn from memory done to scale to fit an A4 sheet knowing that I could adjust the block to fit both paper sizes.

I settled on the bottom sketch which ,while not perfect,  gave me a little more room to play with the braid and blouse. I especially like the wispy hairs of the nape of the neck and the cloud of stray hairs that surround the head and braid.   It will be challenge to carve the hair and while I know how to cut the wispy ones, I haven't really figured out yet how to cut the head and braid themselves..nor how many blocks to dedicate to them.
I ordered a block of Cherry plywood for the keyblock from McClains...it has a good 1/8th inch layer of good cherry veneer and a 9 x 12 inch block should allow me to print both paper sizes.

I glued down the laser copy I made of the drawing and once the paste was dry I peeled back the outer layer of paper to reveal the image. With a thin coating of olive oil,  the remaining paper became translucent and I could follow the drawing to guide the cutting.
I'm using a 4.5 Hangi toh to outline all the hairs.
This particular piece of cherry was pretty dense. Carving was pretty straightforward--if slow-- but clearing the cut bits was harder than usual often requiring 4-5 passes with the toh and back cuts to get the pieces to finally separate from the block. The final carving of the mass of hair of the head and braids was cut with a V-gouge instead of the toh.


I proofed this block yesterday onto thin paper and glued 4 copies down to Shin blocks to start the color plates.  I lost a lot of the detail above and the braid is now a tangled mess. I like it but will need to tease out the definition of the braid better than it printed in the top photo.
But now I think I'll need an additional cherry block to resolve the hair.


Monday, January 10, 2011

copper braid

I'm not far from San Francisco and when a colleague mentioned that Crown Point Press was having a weekend etching workshop I jumped at the chance. One of the premier fine art printing/publishing studios of mostly conceptual/visual artists' work in prints, it meant having access to their amazing studio and help from two master printers.

Since I've been having lots of trouble with my blue press--I need some help with the hands-on part--how to ink and wipe a plate, registration, multiple plate registration, etc. SO I drove up and spent two days and it was exhausting but loads of fun. It's an impressive set up; with separate rooms for acquatint, and acid etching, great lighting, OSHA regulation ventilation and safety features and all the tools and techniques available to help you produce whatever you'd like.

Soft ground, hard ground, spit bite, aquatint, flat bite, chine colle', drypoint, engraving, sugar lift, etc. etc.
Too much for just two days.

I decided to work loosely from my previous figure drawing hoping to be able to play with technique rather than fret about image and detail. I loosely traced my image outlines hoping to work on the braid in line and color as the main subject.


The initial line drawing was reproduced with soft-ground etching giving me nice, hand-drawn quality lines to the contours and basic braid and hair shapes.

Then I blocked out the figure and did a simple aquatint of the background shapes to set them back by making them flat and darker.

Next, I went back in a reblocked the figure and step-etched using aquatint the hair several times to get different tones, once blocking out with a sharpie before going back in the acid bath.

The second one was printed using a burnt umber/black mix; both on white Somerset paper using Charbonel inks.

I'm mostly happy with how it came out. I was hoping for something a bit looser and I wanted the subject really to be the braid. The drawing is a bit off/not quite naive or accurate enough but I like the way the hair came out. I'll probably still go back in with my drypoint needle and add some more wispy hairs but it's mostly done.