Showing posts with label wood engraving. Show all posts

Saturday, March 3, 2018

Chinese Zodiac: 2007-2018-Mokuhanga

With my portrait of Bosco as my "Year of the Dog" print for 2018, I have finished one 12-year cycle  for the Baren Forum's Chinese New Year exchange. Each year I printed enough copies to share with the other printmakers in the exchange, with extras for relatives and colleagues and  a few to give away to collectors or important contacts and usually a few more to sell at occasional print fairs or inquiring visitors to my website. Some years I finished them so late I was too embarrassed to send them out (Tiger) so I have lots. Others are now gone except for a few bad or odd copies.
I should note that the "Year of the Boar" pretty much marks my introduction to woodblock printing as that print and making wine labels were my impetus for starting down this odd path. Here, in chronological order are the prints from this series.
For Baren members thinking, "Hey! I never got one of those!", both Boar and Rat were made with the intention of joining the official exchange, but each time, I procrastinated too much and I missed out on the entry date deadline, and I was a new member and didn't think to ask to still be included so they were not part of the Baren exchange, even though I cut and printed about 60 copies of each....
Note that with the exception of "RAT" which I produced exactly as drawn by my then 8-year-old son Sami, and "Tiger" which is based on a Tibetan Tiger carpet, are of the prints are original designs drawn, carved and printed by me. All are mokuhanga prints except for "Goat/Sheep", which is a wood engraving.
I'd also like to mention, I am not much into astrology, and was happy to illustrate the Chinese zodiac because 1) it gave me artist's license to draw and print some charming creatures in a small, postcard format and as I've mentioned before, 2) a chance to procrastinate until February (and beyond) as the Chinese New Year is a month later than ours and gave me extra time without seeming too late.


Thursday, October 6, 2016

Bloodlust


You'll have to make what you will of this little thing.
The words I repeat often, sottovoce, and are the closest thing to a mantra that comes out of my mouth, usually just before or sometimes after.
But I haven't succeeded.
and I haven't been able to achieve any sort of state of enlightenment.
Not yet.

I think of Kasturba
and wonder how she felt about the Mahatma's vow of chastity.
Was she tired of it all, and relieved to be done with all that.
Or was she angry and resentful, despite the higher calling and important things in the world that needed doing outside.

But then I think of Bukowski, who couldn't be bothered with any of that,
and a bug on the wall while he's sitting on the pot writing poetry.
And we know how that ends.

"Desire", 3'x6" original wood engraving with hand set type and egg tempera.

Monday, September 26, 2016

All abuzz......

I'm participating in the Baren Forum's 70th Print exchange which has no theme but does specify a paper size (3" x 6") as well as a technique "challenge" requesting works done in the spirit of wood engraving.  The due date for finished prints is November 1st and oddly enough (for me),

I'm well on my way.
I've engraved most of the block and I'm now refining the image after taking some rough proofs.
I wasn't happy with the 1st printing--I think my ink was too thick or stiff and my paper a little too rough.
There's a lot of detail cut on the block that's not showing up on the paper and I wasn't sure whether to keep the background.
I cut out the black background with a pair of scissors and decided that I like it better. So I went back to the block with the scorpers to clear it.
Another of the first proofs, trimmed to show what it might look like without the black halo.


I've cleared out most of the background and added a tiny chop to the corner and taken another proof:
Mosquito Proof #2 (on coated bond paper)

Better.  I'm still not happy with the clarity of the legs and torso. But it's pretty close. I've a little tidying up to do with the background and try to make the legs and torso a little more readable.
I still need to set some type for the title and I have an order for paper from Intaglio print makers on the way.  So I'm on hold until the paper arrives.

There are 22 people in the exchange so I need to plan on at least 25-30 copies to have enough for all the participants and still allow for bad copies or printing flubs...and once I see how easily or hard the block is to hand print, I'll decide on the total number of copies and whether there will be both a letterpress text and no-text versions. In the meanwhile there are still some corrections to make and I need to smooth the bottom of the block to allow for trouble-free (or simpler) printing.

Friday, September 23, 2016

Making mine smaller


Here's the reground tip with the piece I broke off.

The shortened tool, ready to go to work.
As I learned from David Sander's book on engraving, and as I've heard from a couple of full-time engravers, the tools I got from Lyons (via McClain's) as well many of the tools that came from my recent  Ebay purchase are too long.
For proper engraving the "mushroom" handle fits in the palm of the hand (and is the driving force) and the point of the tool should be at or just beyond the ball of the thumb for control and leverage.
Many tools were sold much too long and had to be shortened.  That was left to the engraver, but usually the tool would be put in a vise, and a sharp rap with a hammer would break off the tip, and a new point had to be sharpened (or the shank end was reground to fit in the handle).

It's hard to get up the courage to break off 1/3 of the working edge of the tool you just bought.
It feels wasteful and I wasn't sure I was up to proper sharpening.
BUT, I want tools I can use, and several of these; a couple of angle tints and scorpers are missing from my tool kit and needed on the block I'm currently carving.

So I've been doing 1-2 at a time, snapping them off, and then grinding them down with water stones to 30-40degree bevels and taking the time to get them really sharp.

I'm cutting the legs of a mosquito, so I need very sharp tools that I can control (and decent magnification).
More soon. 

Sunday, August 28, 2016

Pnuppet.....


Letterpress 1: Andrew 0
Three words, 13 Letters, 2 spaces. What could possibly go wrong?
You can't imagine how many times I set up and then broke down the chase with my simple title.
Sure it  has to be upside down, and backwards and so I made it so. And yet somehow it was the wrong upside down, or the wrong backwards. I got the words backwards, but not the word order, or they were backwards but not upside down.....The chase will only go into the press one way, and I set the type wrong several times because I didn't take that into consideration. And in the final setup I missed the obvious (clearly visible if I hadn't already redone it 4-5 times....). I probably had it right a few of those times.....and then last night, when I was pretty sure I had it finally right:
Pnuppet.
I don't think that's a word.
Not even for scrabble.
But I'm not easily, or at least permanently, discouraged.
Today, with a fresh start, I sort of got it together......but not without a few hiccups.


But at last, I think I started using the tool closer to the way it's meant to be used.....

And so it begins.


Sunday, August 21, 2016

WoodLust: Part 2

Things happen sometimes seemingly by chance.

It was actually a fair amount of work to get the stumps to this point.


During a brief visit  to California about 4 years ago, I noticed, almost too late, that a neighbor was ripping out a boxwood hedge.  I drove by, then went around the block, parked the car and asked if I could have a few of the stumps...and as they were all destined for the landfill, they said, "less for us to haul away".  So I ran home, grabbed a wheelbarrow and threw 4-5 of the best-looking ones in the barrow and hurried home. As I was leaving for Italy the next day I just threw them under cover in the garage.

I knew boxwood was ideal for really fine detail in the Japanese woodblock prints I was making and I also knew that it was the traditional wood used in end-grain woodblock illustrations from about 1500 until the early 1900's.

And that's how I started engraving.
One of the first rounds off the stump, cut and polished by hand.

"Cardinal Climber", 2014. My very first wood engraving carved from the block above.
Encouraged by my first attempt and with the stumps still slowly seasoning,  I started reading about engraving, looking at the works of engravers and illustrators, and once back in Italy, I tried engraving small pieces of a few of the woods I had available locally; olive branches and the odd round of pear or apple from the pruning we do several times a year.   Jump ahead to this year,  and now after completing a few more engravings,  I decided that the wood was probably seasoned enough to try cutting.  Since my "test" blocks have always been hand-cut, the two surfaces were never perfectly parallel, and needed to be printed by hand with a baren or a spoon. But since I'm thinking of adding text and printing with a letterpress machine.....I needed to find someone with the right tools.


Fortunately I found a local furniture maker and craftsman who was able to cut down two of the better log/stumps into flat rounds. I had him cut them 240mm high, just a tad higher than French/German lead type.........as sanding and polishing should fix that.


So now I have a few years' worth of boxwood and it's time to get to work.


Monday, December 15, 2014

Cabbage Butterfly (relief ink)


Wood engraving, olive wood. Oil relief ink on Japanese paper.
Thanks to the folks over at Intaglio Printmakers in the UK. I got a small package this week of some Japanese papers and a tube of Graphic Chemical Black Relief ink.

As I expected, the difficulties I had printing my little wood engraving were due to the etching ink I was using (too soft) and the poor quality relief ink I had tried that didn't have enough pigment or body.

This rolled out easily and was easy to print with a baren onto a variety of dampened printing and Japanese papers.

I'll print up a few more copies before retiring this little trial block.
I'm sharpening my burins and spitsticker for the next project and ready to try another block.

Sunday, October 26, 2014

La farfalla cavalaia (cabbage butterfly)


I'm still just messing around with some off-cuts of dead wood from the fields.
I have one of the olive branches from several posts ago that was dry enough to work on my engraving. I'm still learning how to hold the tool properly and getting a feel for how the different tools create varying lines--but mostly I'm learning how to control the tool held almost horizontally to the wood surface instead of almost vertically as with the hangi-toh that I use during the moku hanga carving I do.

This was based on a simple doodle of the cabbage butterfly. The drawing was bigger and more decorative so for this small round I just sketched out the butterfly and a flowering twig.
The olive was harder to carve than the boxwood from my cardinal creeper print and my rough handling shows.
hosokawa Japanese washi, printed with a baren

I couldn't find any relief ink--Rigacci--THE local art store has "stopped carrying it" so all I had was a tube of Charbonnel etching ink. It was too soft to properly roll out and it didn't print well. It was too soft so filled the lines and then wasn't tacky enough to hold the dampened paper down and a bunch shifted as I was printing and had to be thrown. I had 4-5 mediocre prints of which this was one of the best....(and it is still poorly printed--too much ink and poor impression to the margins). Another, on Italian etching paper, didn't want to sit still and I ended up printing with too little pressure for fear of it shifting.
This is on Magnani etching paper...too weak an impression with the baren.


Nevertheless,
With a little watercolor, a touch of pen and ink for the weak spots and gaps
it made a nice little birthday card for my mother-in-law who turned 89 yesterday.


Now to find some relief ink! I'll try and print a couple more of these just for fun.....
I've been hesitant to break out the good wood, but it's time to try something a little better and bigger....but I have a few moku hanga projects first so stay tuned (if  you were ever tuned.....).

Monday, August 18, 2014

Stumps and flowers

Cardinal Creeper, wood engraving and watercolor; 8"x8".
About a year ago, I was walking home from the clinic on one of my last shifts of the Summer. I noted a neighbor had almost finished taking out a boxwood hedge. The tops had been sawn off and they were trying to dig and pry out the stumps and roots. My first thought was whether any could be salvaged for Bonsai....Boxwood takes forever to grow and an abandoned plant would be perfect....but these had been too badly damaged. But I asked the owner if I could grab a few pieces.....I heard boxwood was ideally suited for wood engraving....and I'd never tried it as it's become too hard to find endgrain blocks and too expensive to have them made....but I could saw off the end of a stump and these would cost only my labor.

I came back with a box, threw in the fattest trunks and took them home. I didn't have time to properly treat them; but I put half in my mildly damp studio and the others I put under the Pizza oven/which was covered with a tarp. I hoped in my year away that they would dry....and not crack too badly.


This Summer, I've been too busy with house works and other health issues to really do any artwork. But I did have time to pull out the stumps and survey the wood.  Most of the big pieces had checked (cracked) rather badly.....but I sawed off a few rounds........I sanded a couple smooth; and took the ugliest, most suited to a test carving, and continued sanding until it was glass smooth.

I drew a sketch of a plant I've been meaning to do a print of for a couple of years....
Cardinal climber or creeper (the name changes and they're not exactly the same....but it's a cross of a wild and domestic climbing morning glory). It's a great humming bird attractor and I've planted it a couple of times with little success, but last Summer my housemate Sandy got some to grow; and I took a few sketches/photos.


So armed with a subject; a sketch; a wood round; and a few engraving tools I decided to give it a go.
Since this will be only one block and the registration will not be an issue. I just redrew my sketch onto the smooth end. I tinted the block with a little greenish wash to help show the future cuts.
It was a bit of a mess; I didn't really know how to hold or use the tint--the sharp pointed tool used to outline my shapes. Nor did the scorpers---clearing tools seem to want to obey my clumsy hands.  But by the second day, I resharpened the tools,  tried holding them at a shallower angle and things started to go better. And by the time I decided I was done (parts were shaggy and ragged, others clean and well-defined). This was meant to be a test and I didn't want to expend too much time and energy on an experiment.


After one day of hacking and stuttering....

A few days later; the tools are sharper, and I'm going about it from a shallower angle.

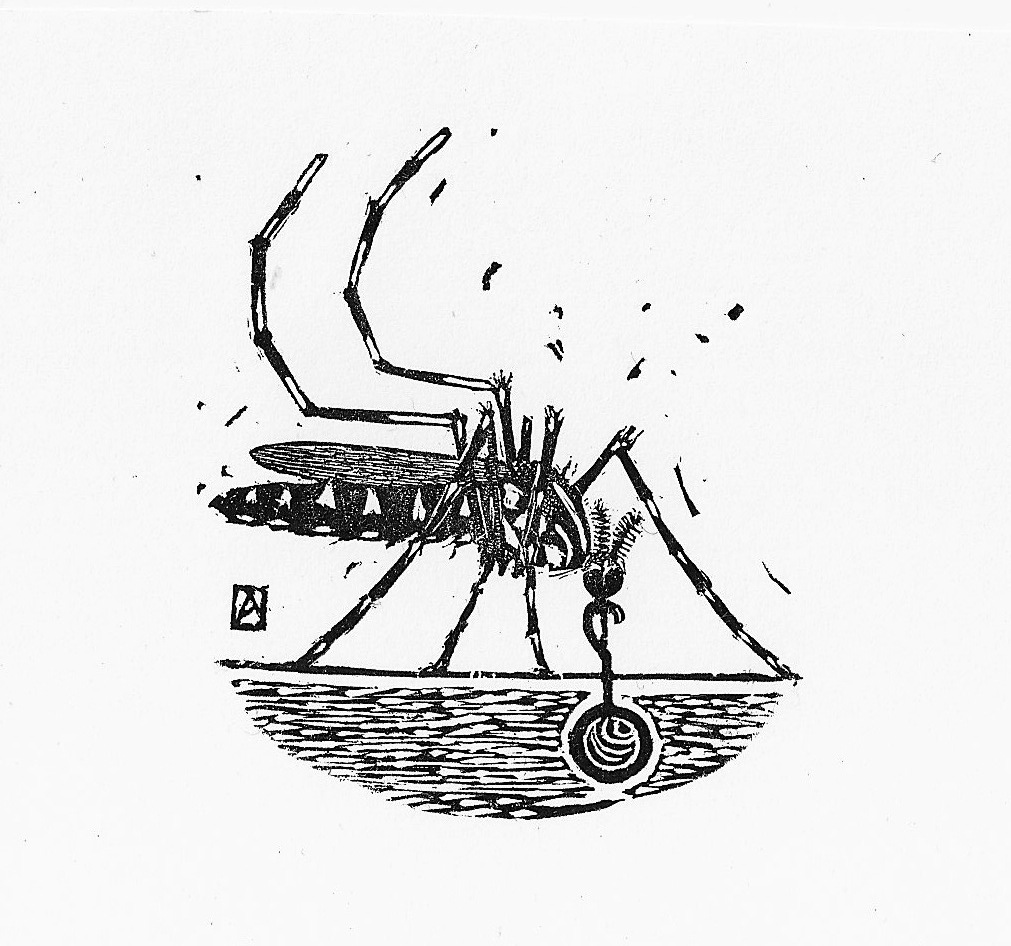
Cardinal Climber, 8"x8" on Echizen Kozo; Akua Carbon Black Intaglio ink.
And here is the result.

These were printed by hand using a baren. I printed a few onto a Japanese paper (echizen kozo--here) and two papers better suited for engravings and etchings.

The back of the block was still uneven stump so printing was a bit of a disaster...I ended up making a clay base to hold the block, I'd lay the damp paper in place, set it with a light pressure of the baren, then pick the whole thing up and supported with one hand from behind, rub the surface with the baren hard....I got the hang of it after about 4-5.......

The few good, even impressions I'll leave alone.
The few weak impressions I'll go over as above with some watercolor.......
 
It was fun to try and the results, although crude, are appealing--I like the crisp effects the crosshatching yields, and I'm not really used to working in black and white--but I'll try to pick out a few ideas that will work well in this format and technique.  I like close hand work and detail, so it's a technique I might be able to use to my advantage, once I get better at it.


I'll let the stumps dry for another year (they'll carve better). But I'll take a few rounds with me when I head back to Italy this September.  It's a totally different technique than moku hanga, and I'll have to work really small......but I want to try another one......