Saturday, November 19, 2016
Miracles--Bokashi 2 of x?
The second color from the other day.
This block is pretty much retired. Now I'm going to be playing with the background using 2 blocks to selectively mask and enhance these shapes.
But most of what you see is going to disappear.
Labels:
civil war,
cluster bombs,
fire,
meteors,
miracles,
moku hanga,
woodblock,
woodblock print
Wednesday, November 16, 2016
Miracles
While I have a couple of print ideas bouncing around my head, I started this with no advance planning. It started as a test block--I was testing the sharpness of the V-gouges I sharpened for class and the cheap, thin stock I was cutting--here they call it fromager (cheese?) wood and I haven't yet figured out what it would be called in English--cut cleanly with the just-sharpened tools. It's soft and has a prounounced grain but doesn't look like it will hold any detail.
From the test block came an idea, and I cut another block to match the first and a few test prints later I was at the printing bench. The two blocks are complementary--they're positive and negative but also coarse vs. elegant and they'll be working with and against each other as this print progresses.
Here's the rough test of the cut block printed on bond paper--
and below, the same block, now cleaned up and printed in yellow, on good Japanese washi.

This is the first of many bokashi printings to come.
I printed a second color tonight but didn't have time for photos.
I set it all aside in the damp pack for a few days as I have more olives to pick (we're making olive oil) and until the rains start, I'm needed in the fields. But I'm hoping to start printing the second block in the next couple of days.
I'm still hopeful that this might come out and
happy as all get out to be printing on Echizen Kozo again.
A.
Labels:
echizen kozo,
fire,
miracles,
moku hanga,
mulberry,
rain,
washi,
woodblock print
Sunday, November 6, 2016
Paper Trials and Tribulations
![]() | ||
| My favorites of this mosaic are the maybe "Hosho Select?" top row L; and the bottom R, Shin Hosho(from Intaglio Printmakers). |
I have continued to try to locate a reliable source of sized, student-grade paper suitable for general work and student workshops.
My favorites for my own work, the reliable and consistent papers that always print beautifully for moku hanga are still Echizen kozo and Kizuki Hanga and Nishinouchi (from McClains in the US) and Mawata light and Kihada Light and Shin Hosho--all via Woodlike Matsumura in Japan or Intaglio Printmakers in the UK. But these papers run from $20-45$/sheet and I'm always looking for a paper I can get in Italy that is suitable for general work.
So I was very pleased when the Awagami paper factory started to begin to market their art and printmaking papers in the West. In a packet I received for my entry in a recent show, I received a selection of printmaking papers from Awagami. I pulled out the ones that looked like they'd be workable for moku hanga--either by feel or from their descriptions.
I also did a series of test prints, trying out this simple 4-block print to see how each would print and hold up to the several layers and colors.
The etagami drawing above was done by a 12-year old neighbor. I cut it as a 4-block simple woodblock print with 2 bokashi layers and no background.
For comparison: here is the same print on two western papers;
Zerkall Smooth and Annigoni
![]() |
| Zerkall smooth |
![]() | |
| Annigoni a 100% cotton watercolor paper from Magnani |
Based on these trials; I chose a couple papers for my recent workshop.
In addition to the double weight coated Bond paper that I use for proofing.
I cut up sheets of Zerkall Smooth, Magnani incisioni for European papers and based on the above tests the Hosho Select and Okawara Select from the Awagami line of editioning papers.
The latter papers are now available in Europe and I was pleased that these two midrange papers were both listed as suitable for water-based woodblocks on the Awagami site and confirmed in my trials.
Unfortunately, the paper that arrived was different in the hand than the papers I'd tested.
The Hosho select (top L above), while being listed as good for water-based woodblock prints is is listed in the Awagami catalog as Unsized(that's not good) and a laid paper....just like the paper that arrived....but UNLIKE the paper I tested which acted like my old favorite and heavily sized Shin Hosho and had NO laid lines......
And when I went to dampen the paper I had carefully pre-cut for my students.....It clearly sucked up the water like blotter paper and was too soft to be workable.
The Okawara Select was the same as in my trials, but at the larger size I gave my students it too was a little too soft, and since they didn't carve deeply or cleanly enough, most got spotting and ruined prints as the paper was a little too soft and floppy for beginners.
So, I'll have to look again at the others: the shiramine and bamboo papers didn't print badly and I'll try a few more before I decide what to try for my next class.
Labels:
Awagami,
Fabriano,
japanese paper,
kozo,
Magnani,
moku hanga,
printing,
red.,
testing papers,
watermelon,
Zerkall
Thursday, October 6, 2016
Bloodlust
You'll have to make what you will of this little thing.
The words I repeat often, sottovoce, and are the closest thing to a mantra that comes out of my mouth, usually just before or sometimes after.
But I haven't succeeded.
and I haven't been able to achieve any sort of state of enlightenment.
Not yet.
I think of Kasturba
and wonder how she felt about the Mahatma's vow of chastity.
Was she tired of it all, and relieved to be done with all that.
Or was she angry and resentful, despite the higher calling and important things in the world that needed doing outside.
But then I think of Bukowski, who couldn't be bothered with any of that,
and a bug on the wall while he's sitting on the pot writing poetry.
And we know how that ends.
![]() | |
| "Desire", 3'x6" original wood engraving with hand set type and egg tempera. |
Monday, September 26, 2016
All abuzz......
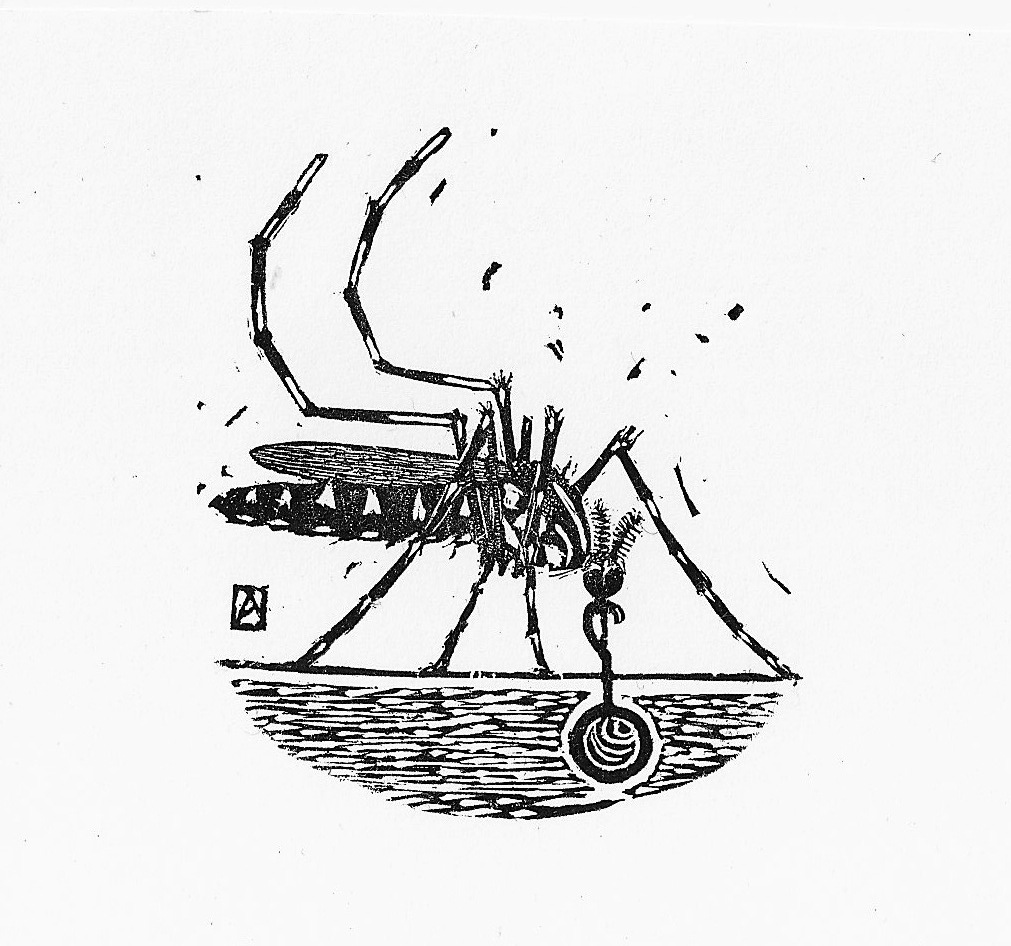
I'm participating in the Baren Forum's 70th Print exchange which has no theme but does specify a paper size (3" x 6") as well as a technique "challenge" requesting works done in the spirit of wood engraving. The due date for finished prints is November 1st and oddly enough (for me),
I'm well on my way.
I've engraved most of the block and I'm now refining the image after taking some rough proofs.
I wasn't happy with the 1st printing--I think my ink was too thick or stiff and my paper a little too rough.
There's a lot of detail cut on the block that's not showing up on the paper and I wasn't sure whether to keep the background.
I cut out the black background with a pair of scissors and decided that I like it better. So I went back to the block with the scorpers to clear it.
I've cleared out most of the background and added a tiny chop to the corner and taken another proof:
Better. I'm still not happy with the clarity of the legs and torso. But it's pretty close. I've a little tidying up to do with the background and try to make the legs and torso a little more readable.
I still need to set some type for the title and I have an order for paper from Intaglio print makers on the way. So I'm on hold until the paper arrives.
There are 22 people in the exchange so I need to plan on at least 25-30 copies to have enough for all the participants and still allow for bad copies or printing flubs...and once I see how easily or hard the block is to hand print, I'll decide on the total number of copies and whether there will be both a letterpress text and no-text versions. In the meanwhile there are still some corrections to make and I need to smooth the bottom of the block to allow for trouble-free (or simpler) printing.
I'm well on my way.
I've engraved most of the block and I'm now refining the image after taking some rough proofs.
I wasn't happy with the 1st printing--I think my ink was too thick or stiff and my paper a little too rough.
There's a lot of detail cut on the block that's not showing up on the paper and I wasn't sure whether to keep the background.
I cut out the black background with a pair of scissors and decided that I like it better. So I went back to the block with the scorpers to clear it.
![]() |
| Another of the first proofs, trimmed to show what it might look like without the black halo. |
I've cleared out most of the background and added a tiny chop to the corner and taken another proof:
![]() |
| Mosquito Proof #2 (on coated bond paper) |
Better. I'm still not happy with the clarity of the legs and torso. But it's pretty close. I've a little tidying up to do with the background and try to make the legs and torso a little more readable.
I still need to set some type for the title and I have an order for paper from Intaglio print makers on the way. So I'm on hold until the paper arrives.
There are 22 people in the exchange so I need to plan on at least 25-30 copies to have enough for all the participants and still allow for bad copies or printing flubs...and once I see how easily or hard the block is to hand print, I'll decide on the total number of copies and whether there will be both a letterpress text and no-text versions. In the meanwhile there are still some corrections to make and I need to smooth the bottom of the block to allow for trouble-free (or simpler) printing.
Friday, September 23, 2016
Making mine smaller
![]() |
| Here's the reground tip with the piece I broke off. |
![]() | |
| The shortened tool, ready to go to work. |
For proper engraving the "mushroom" handle fits in the palm of the hand (and is the driving force) and the point of the tool should be at or just beyond the ball of the thumb for control and leverage.
Many tools were sold much too long and had to be shortened. That was left to the engraver, but usually the tool would be put in a vise, and a sharp rap with a hammer would break off the tip, and a new point had to be sharpened (or the shank end was reground to fit in the handle).
It's hard to get up the courage to break off 1/3 of the working edge of the tool you just bought.
It feels wasteful and I wasn't sure I was up to proper sharpening.
BUT, I want tools I can use, and several of these; a couple of angle tints and scorpers are missing from my tool kit and needed on the block I'm currently carving.
So I've been doing 1-2 at a time, snapping them off, and then grinding them down with water stones to 30-40degree bevels and taking the time to get them really sharp.
I'm cutting the legs of a mosquito, so I need very sharp tools that I can control (and decent magnification).
More soon.
Labels:
burins,
engraving,
sharpening,
spitsticker,
wood engraving,
woodblock print
Wednesday, September 14, 2016
Mosquito paralysis
My first clumsy engravings were really carved almost without thinking. I didn't really consider what I was doing. I had a block, and a couple of tools so I just cut them and printed the resulting image without giving any thought to how I was working or the still unknown ways of working in wood engraving.
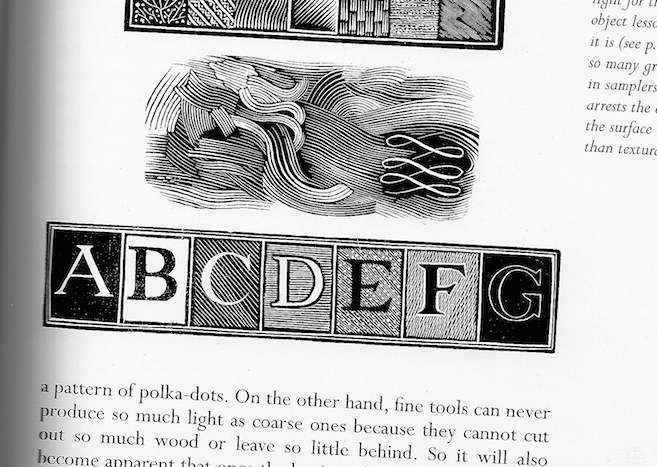
After finishing my last simple Puppet engraving, I finally picked up a copy of Simon Brett's book,"Wood Engraving How to do it", that I had purchased some time ago. I must admit that going through it has sort of stopped me in my tracks.
There is a great deal of useful information and illustrations: this section on how to make a "sampler" of the tools and the different ways to consider letters is really helpful.
![]() |
| Illustration from Brett's book on engraving showing lettering styles. |
![]() |
| Illustrations from S. Brett's Book on Engraving. |
There are more examples--many more as this image gets resolved in many different ways and styles.
Many aren't suited to my work or habit but in theory, I should be pulling from these as needed when solving issues of tone and depth require differing techniques.
So I'm back to the block thinking: now what?
I've done enough trials on scrap wood that I'd like to try a piece of real boxwood and see what the smoother cutting and fine grain will allow. I have a small off-cut of European Boxwood that I've been saving for a small work and I have an on-again, off-again series of parasites and small insects that I wanted to add to and I have many small mosquito thumbnails that I've drawn over the last weeks and from which I managed to cobble together an image I'm happy with.
The above photo shows my prepared drawing applied to the surface of my block. The block is just 2.5" in diameter so the image is pretty small. So now I'm ready to go but I've been hesitating. Thinking for example of how to resolve the "tiger" aspect of the alternating black and white bands of the insect legs.
And in this case, my small frail insect on a round of box can be resolved in lots of ways.....most of which I had never even considered until now. The biggest decisions--whether to carve the insect as a white drawing lifted out of the black ground or to engrave around my drawing--preserving the drawing itself by cutting everything else away which is a bit more natural for me coming from my moku hanga experience.
The good news however is that while I've been procrastinating, mulling over in my mind what I think I'd like to do, I've been sharpening my tools. Slowly I've been selecting the gravers I'm likely to use, and they've been cleaned and sharpened and honed and then honed again and so are actually ready to cut.

Meanwhile, as I stare at the block, I have to keep the fan on as the mosquitoes are honing in on my exhaled CO2 and my bare ankles and calves under the table while I sit, inactive, thinking about the first cut.
Labels:
anopheles,
blood borne illness,
engraving,
insect,
mosquito,
parasite,
print,
Simon Brett,
wood cut,
Zika
Subscribe to:
Posts (Atom)