Showing posts with label figure drawing. Show all posts

Saturday, July 25, 2015

More Hair

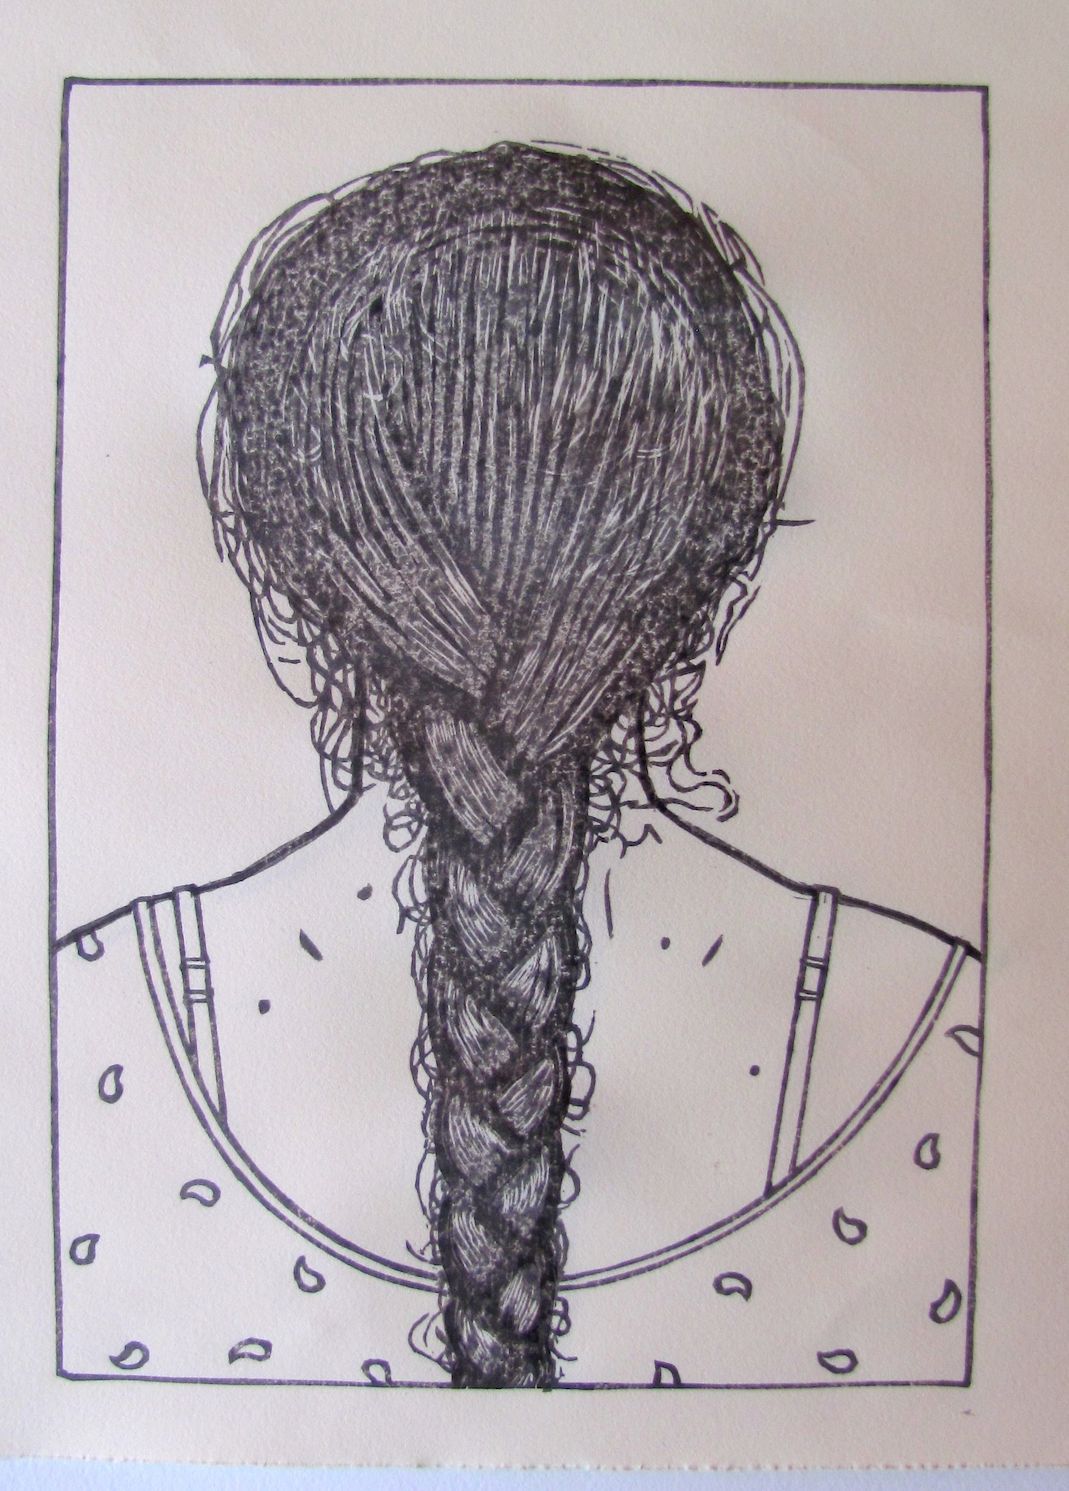
The proof of the keyblock reveals that it prints oddly. The cherry is resisting a bit the ink and printed lightly it prints weakly despite the density of the Sumi I'm using. If I print firmly (really hard) I get an almost lithographic-like effect from the wood. The problem is the wavy hair is on the same block as my keyblock and they really should have been on separate blocks as the key block wants lighter pressure for the finer lines that might be damaged by the amount of pressure I'm using to print the hair.  I can sort of cheat using a weak baren to print the block and then go back with a stronger baren to print just the central part where the head and braid are.
It's hard to believe this is woodblock.


The new problem is that it looks great--it's a great tangled mess of hair--very like my wife's actual hair--but the braid definition is now hard to read as there is too much of the same black value where there should be more range.  I thought about it for a while and finally cut another block...the back of the cherry plywood that I got from McClains has a birch plywood veneer to the back side and while it was much harder to carve than the Shina it was more than adequate for the simple block I needed to cut (although there were some knots and voids under the veneer...
So printing this new block in a value darker than the braid yields something closer to my original drawing.


I also cut from a separate Shina block a plate with a simple solid braid/head shape by cutting out just the shape of the braid and head as a solid form.
This will serve to give the head and hair their base color--like a griseille painting the value will come from the black and white keyblock while the color will come from a brown glaze.


Now I just have to decide if I like this better than the way it was without it.
The tangled mass of hair is energetic and plays well against the flat colors of the torso and background....but I still have plans for those.


Here they are with color added:
To the left (orange blouse) is just the keyblock with the added brown base block.
Below (yellow blouse), is the same but with the addition of the braid outline block added last.


Thursday, July 21, 2011

Doodles

Here are a few of the scribblings I did in the waiting room Monday.

All of the half-circle shapes are for a large, collaborative puzzle print and my small piece of wood is this shape.
I still haven't really decided on a direction.

The lampreys are one of the recurring opportunistic/parasitic organisms that inhabit my sketchbooks and psyche....

The lungs.....I don't know; holding my breath?inside/outside? Life/living?
Again it's an image that I've drawn over and over; sometimes quite literally, other times more oddly hidden or masked.

I've been looking over these and my sketchbooks these few days.
I'm off during Alex's recovery so I've had some time at home.
I'm getting itchy to start a NEW print....I've even been looking at my blank blocks and plank lumber, just looking at boards as sometimes the wood itself will tell me what to do.
I'm waiting for the dust to settle and A. to return to normal before I really go forward. But he's healing fast and I've had hours to myself when he hasn't really needed supervision.

I even managed to pull a stack of damp, partially-printed rabbit prints out of the freezer and finish them yesterday!
They're in a stack drying by the vent and should be ready to go out in the next 1-2 days!

Wednesday, July 20, 2011

Waiting Room

Cholesteotoma

It's always a bad sign when the doctor says the procedure should only take an hour or so and three hours pass and you're still in the waiting room, beneath the large clock, a magazine rack full of old magazines and the drip coffee pot with acid coffee and artificial whitener.

I brought a clipboard with all the necessary papers and a stack of sheets of bond paper, thinking I would probably be here longer than we had hoped for.

Doodles of projects that I've not yet started emerge. Two print exchanges I've signed up for but not really thought about and some recurring images that have been coming back again and again.

But the longer I waited the more medical became the drawings until finally I just drew what we were really worried about. This is a highly rough schematic of the middle and inner ear as imagined if seen in a frontal slice through the skull. I've drawn/imagined a clean middle ear with the three little bones, the incus, malleus and stapes all in place against the snail-like, spiral cochlea and mastoid. I've studied anatomy but this is fancifully imagined and would make my old anatomy teachers cringe with dismay. But I'm engaging in guided imagery, positively thinking about good outcomes with the naive hope of a parent, whose child is again under general anesthesia, trusting us to have made the right decision and that everything will be all right.

A. is having his fourth operation on his middle ear to see if the benign tumor he was born with has come back, or if his recurring hearing issues and infections are just scarring and fluid. The Surgeon and Operating Room had scheduled him for just an hour, which means the doctor actually expects it to be quick and easy, probably just fluid and a reconstruction of his ear bones...but the delay suggests otherwise. Cholesteotoma is an benign, but erosive and very slow growing tumor of the middle ear and is noted for being recurrent. A. has had several infections in the last 2 years, and a recent polyp was a telltale warning that things were again amiss.

When the surgeon finally emerges to bring us news, it is not the end of the world, but not what we had hoped.

The growth had come back, they had to take out what was left of his middle ear bones to clean out what had wrapped around them and couldn't be dissected away. They'll have to go back in again in 6-9 months; at that time they should be able to see if they truly have gotten it all out and replace the missing bones with a titanium implant so he can hear again out of that ear. We were led into the recovery room where A. was already awake, a large dressing on one ear, looking like a dog who had just had one of his ears cropped.
But awake, not crying, asking again and again (the sedatives had temporarily knocked out his short-term memory) what they had found. In the lull between his frequent awakenings and resting, and before we took him home, I added to the drawing the small black growth around the little bones that aren't there anymore.

Monday, January 10, 2011

copper braid

I'm not far from San Francisco and when a colleague mentioned that Crown Point Press was having a weekend etching workshop I jumped at the chance. One of the premier fine art printing/publishing studios of mostly conceptual/visual artists' work in prints, it meant having access to their amazing studio and help from two master printers.

Since I've been having lots of trouble with my blue press--I need some help with the hands-on part--how to ink and wipe a plate, registration, multiple plate registration, etc. SO I drove up and spent two days and it was exhausting but loads of fun. It's an impressive set up; with separate rooms for acquatint, and acid etching, great lighting, OSHA regulation ventilation and safety features and all the tools and techniques available to help you produce whatever you'd like.

Soft ground, hard ground, spit bite, aquatint, flat bite, chine colle', drypoint, engraving, sugar lift, etc. etc.
Too much for just two days.

I decided to work loosely from my previous figure drawing hoping to be able to play with technique rather than fret about image and detail. I loosely traced my image outlines hoping to work on the braid in line and color as the main subject.


The initial line drawing was reproduced with soft-ground etching giving me nice, hand-drawn quality lines to the contours and basic braid and hair shapes.

Then I blocked out the figure and did a simple aquatint of the background shapes to set them back by making them flat and darker.

Next, I went back in a reblocked the figure and step-etched using aquatint the hair several times to get different tones, once blocking out with a sharpie before going back in the acid bath.

The second one was printed using a burnt umber/black mix; both on white Somerset paper using Charbonel inks.

I'm mostly happy with how it came out. I was hoping for something a bit looser and I wanted the subject really to be the braid. The drawing is a bit off/not quite naive or accurate enough but I like the way the hair came out. I'll probably still go back in with my drypoint needle and add some more wispy hairs but it's mostly done.